

.jpg)


.jpg)


Ten Out Of Ten, Zen And Xen
The team at AluFold Direct believe they have achieved a ten out of ten and a state of Zen with the launch of Xenlite – an easy fit option for...
Read Full Article
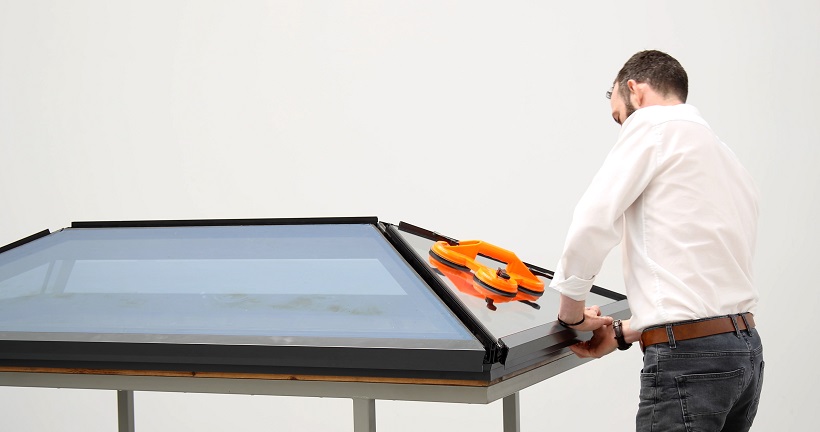
The estimated fitting time for a 2m x 1m Xenlite is just 20 minutes, says AluFold Direct - all the more impressive when you consider it has been designed to be fitted by one person.
Joe Cann, AluFold Direct’s Design and Installation Manager, sets out the installation process. He writes, there are lots of clever features which make Xenlite stand out but probably the most significant one for installers is the fact that they don’t have to wait until all the glazing sections are in place before they can secure them to the ring beam. Each section is clipped one by one into a specially designed glass retention flange on the ring beam, so there is no danger of any of the glass slipping at any point.
Ring beam
Once you’ve unpacked the roof lantern kit and clecked the colour coded bags of fixings and screws, you can connect all four lengths of the ring beam using two cleats per corner and draw the sections together with pan head tapping screws.
Turn the ring beam frame upside down to apply silicone all the way along the channel underneath. (Use packers to ensure there is a consistent 10mm gap between the ring beam and the upstand.)
Position this onto a correctly sized timber upstand, fixing through the internal leg of the ring beam using our wood screws. (Remember the timber upstand must be at least 150mm tall to comply with Building Regs.)
Rafters
Position the four hip beams into the ridge spider assembly and insert M4 bolts to fix (ensuring the thread is fully engaged and the screw heads are all flush).
Place the ridge and rafter beam assembly carefully into the machined slots within the ring beam and fix securely using self-drilling screws into the countersunk holes.
Apply a generous bead of silicone to the ends of the ridge thermal break and attach this to the ridge profile.
Clip the other thermal break sections to each of the rafters and slide these up to meet the ridge (you can fill any remaining gaps with a bead of silicone). Use more of the self-drilling screws to hold them in place (two in each).
Glazing
Attach the PVC glazing end trim to each of your glass units (double check the glass label to make sure the external face is the right way up). Then attach the aluminium glazing bead to this PVC end trim and make sure these two are lined up at the ends.
Carefully lower each glass unit into position and lock the glazing bead into the ring beam profile as you go. (Before you completely let go of the glass, apply upward and outward force to the bead to make sure the two profiles have locked together correctly.)
Once all the glass is fixed in place, you can attach the top caps onto the ridge and rafters, making sure they are clipped into the thermal break. (You might need to just tap these into place with a rubber mallet.)
Make sure all the gaskets meet at the ridge to form a complete seal and you’re done.
“We know there are some real bugbears for installers when it comes to fitting lanterns. Obviously, securing the glass to the ring beam was the main one but there are others such as slotting the cleats into the ring beam.”
– Simon Johnstone
Technical director, AluFold Direct
Beating the bugbears
“As a design team, we started out with those and worked out how we could overcome them with Xenlite” continues Johnstone. “The feedback we’re getting from installers who have seen the lantern being assembled in our factory would suggest we’ve done a pretty good job.”
Picture: AluFold Direct’s new Xenlite lantern has been launched with the bold claim that it is safer, simpler, and quicker to install than other lanterns already out there in the market.
Article written by Cathryn Ellis
04th August 2022